
DIY projects for home entertainment include building game tables, creating TV walls, and installing LED lighting. They’re budget-friendly, easy, and fun.
ManlyZine.com
Ready to upgrade your space? These DIY projects for home entertainment—from game tables to custom lighting—add fun and function to your home.
Are you a middle-aged man looking for exciting DIY projects to keep yourself entertained and engaged? Look no further! In this comprehensive guide, we have curated a list of unique and engaging DIY projects specifically tailored to the interests and lifestyle of middle-aged men. From woodworking to home decor, we have something for every skill level and interest. So roll up your sleeves, grab your tools, and let’s dive into the world of DIY!
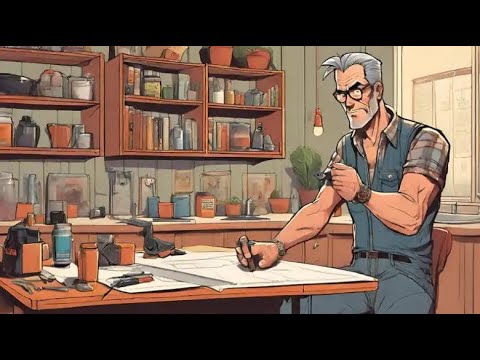
Table of Contents

1. Building a Wooden House Number Sign
One simple yet impactful DIY project that you can start with is building a wooden house number sign. Not only will this project make your home stand out on the block, but it also allows you to showcase your creativity and craftsmanship. The materials required for this project are easily accessible, and the construction process is straightforward. Let’s get started!
1.1: Materials Needed
To build a wooden house number sign, you will need the following materials:
- Wooden board
- House numbers
- Sandpaper
- Paint or stain
- Brushes
1.2: Step-by-Step Instructions
Follow these step-by-step instructions to create your wooden house number sign:
- Start by selecting a wooden board of your desired size and shape. Ensure that it is smooth and free from any imperfections.
- Sand the wooden board to create a smooth surface. Pay attention to the edges and corners.
- Decide on the placement of your house numbers and mark their positions on the wooden board.
- Attach the house numbers securely to the board using screws or adhesive.
- Apply a coat of paint or stain to the wooden board, allowing it to dry completely.
- Once the paint or stain is dry, add any additional decorative elements or finishes to personalize your sign.
- Finally, mount your wooden house number sign securely outside your home using screws or hooks.
2. Creating a Bookshelf Chair

If you’re up for a more challenging DIY project, why not try your hand at building a bookshelf chair? This unique piece of furniture serves a dual purpose, combining comfort with functionality. It’s the perfect addition to any reading nook or home library. Let’s dive into the details!
2.1: Materials Needed
To create a bookshelf chair, gather the following materials:
- Wood boards
- Screws
- Wood glue
- Saw
- Drill
- Sandpaper
- Cushions or upholstery (optional)
2.2: Step-by-Step Instructions
Follow these step-by-step instructions to create your own bookshelf chair:
- Begin by designing the structure of your bookshelf chair. Consider the dimensions and layout that will best suit your space and comfort.
- Cut the wood boards to the appropriate measurements using a saw.
- Assemble the wooden pieces to form the frame of the chair, using screws and wood glue for added stability.
- Sand the surfaces of the chair to create a smooth finish. Pay attention to any sharp edges or rough spots.
- If desired, add cushions or upholstery to the seat and backrest for added comfort and style.
- Apply a protective finish to the wood to enhance its durability and appearance.
- Once the finish is dry, place your favorite books on the built-in shelves and enjoy your new bookshelf chair!
3. Building a Coffee Table from Pallets

Do you have leftover wood pallets from previous projects? Put them to good use by creating a unique and rustic coffee table. Pallets are versatile materials that can be transformed into functional and stylish furniture pieces. Let’s see how you can turn those pallets into a beautiful coffee table!
3.1: Materials Needed
To build a coffee table from pallets, gather the following materials:
- Wood pallets
- Screws
- Drill
- Sandpaper
- Stain or paint
- Brushes
3.2: Step-by-Step Instructions
Follow these step-by-step instructions to create your pallet coffee table:
- Select two or more pallets of similar size and shape. Ensure that they are clean and free from any damage.
- Sand the surfaces of the pallets to remove any rough edges or splinters.
- Arrange the pallets in the desired configuration, aligning them to create the tabletop.
- Secure the pallets together using screws and a drill. Make sure they are tightly attached to each other.
- Sand the tabletop and any exposed surfaces to create a smooth finish.
- Apply a coat of stain or paint to enhance the appearance of the coffee table. Allow it to dry completely.
- Once the finish is dry, place your coffee table in your desired location and enjoy!
4. Crafting a Wooden Tool Box

Every handyman needs a reliable and stylish toolbox to store their tools. Instead of buying one, why not craft your own wooden toolbox? This project allows you to showcase your woodworking skills while creating a practical and personalized storage solution. Let’s get started on building your very own wooden tool box!
4.1: Materials Needed
To craft a wooden tool box, gather the following materials:
- Wood boards
- Screws
- Wood glue
- Saw
- Drill
- Sandpaper
4.2: Step-by-Step Instructions
Follow these step-by-step instructions to create your wooden tool box:
- Begin by designing the dimensions and layout of your tool box. Consider the size and number of compartments that will accommodate your tools.
- Cut the wood boards to the appropriate measurements using a saw.
- Assemble the wooden pieces to form the walls and base of the tool box, using screws and wood glue for added stability.
- Create compartments or dividers within the tool box to organize your tools effectively.
- Sand the surfaces of the tool box to create a smooth finish. Pay attention to any sharp edges or rough spots.
- Apply a protective finish to the wood to enhance its durability and appearance.
- Once the finish is dry, fill your tool box with your favorite tools and enjoy the convenience of having everything organized in one place.
5. Constructing a Pallet Rack

Expanding on the idea of utilizing pallets for DIY projects, let’s explore how you can create a pallet rack. This versatile storage solution is ideal for organizing your garage, workshop, or any space where you need additional storage. Let’s get started on constructing your very own pallet rack!
5.1: Materials Needed
To construct a pallet rack, gather the following materials:
- Wood pallets
- Screws or nails
- Hammer or drill
- Saw (optional)
- Sandpaper (optional)
5.2: Step-by-Step Instructions
Follow these step-by-step instructions to construct your pallet rack:
- Select two or more pallets of similar size and shape. Ensure that they are clean and free from any damage.
- Determine the desired height and width of your pallet rack.
- If necessary, use a saw to trim the pallets to the desired size.
- Position the pallets vertically, ensuring they are aligned and stable.
- Secure the pallets together using screws or nails. Make sure they are tightly attached to each other.
- If desired, sand the surfaces of the pallet rack to create a smooth finish.
- Once the pallet rack is assembled and finished, place it in your desired location and start organizing your items.
6. Creating Baseball Bookends

Add a touch of sportsmanship to your bookshelf with unique baseball bookends. This DIY project combines scrap wood, baseballs, and a few tools to create functional and decorative bookends. Let’s get started on crafting your very own baseball bookends!
6.1: Materials Needed
To create baseball bookends, gather the following materials:
- Scrap wood
- Baseballs
- Screws or nails
- Saw
- Sandpaper
- Paint or stain (optional)
- Brushes (optional)
6.2: Step-by-Step Instructions
Follow these step-by-step instructions to create your baseball bookends:
- Begin by selecting a piece of scrap wood that is wide and sturdy enough to serve as the base for your bookends.
- Cut the scrap wood into two equal-sized pieces, ensuring they are tall enough to hold your books securely.
- Sand the surfaces of the wood pieces to create a smooth finish.
- Attach the baseballs to the front of each wood piece using screws or nails. Make sure they are securely fastened.
- If desired, paint or stain the wood pieces and baseballs to enhance their appearance. Allow them to dry completely.
- Once the paint or stain is dry, place your baseball bookends on your bookshelf and display your favorite books with a touch of sportsmanship.
7. Designing Beer Coasters

If you’re looking for a simple and fun DIY project, why not create your own beer coasters? These coasters not only protect your surfaces from condensation but also add a personal touch to your home bar or entertainment area. Let’s dive into the details of designing your very own beer coasters!
7.1: Materials Needed
To design beer coasters, gather the following materials:
- Thin sheets of wood
- Saw
- Sandpaper
- Paint or stain
- Brushes
7.2: Step-by-Step Instructions
Follow these step-by-step instructions to design your beer coasters:
- Start by selecting thin sheets of wood that can be easily cut into the shape you desire for your coasters.
- Use a saw to cut the wood sheets into individual coaster-sized pieces. Ensure that they are all the same size.
- Sand the surfaces of the coasters to create a smooth finish. Pay attention to the edges and corners.
- If desired, paint or stain the coasters to add color or enhance the natural beauty of the wood. Allow them to dry completely.
- Once the paint or stain is dry, your beer coasters are ready to use! Place them on your surfaces and enjoy your favorite beverages without worrying about unsightly water rings.
8. Crafting Wooden Beverage Crates

Carrying multiple beverages can be a challenge, especially during outdoor gatherings or parties. With wooden beverage crates, you can transport your drinks with ease and style. These crates are not only functional but also customizable to suit your preferences. Let’s explore how you can craft your very own wooden beverage crates!
8.1: Materials Needed
To craft wooden beverage crates, gather the following materials:
- Wood boards
- Screws or nails
- Saw
- Drill
- Sandpaper
- Paint or stain
- Brushes
8.2: Step-by-Step Instructions
Follow these step-by-step instructions to craft your wooden beverage crates:
- Begin by designing the dimensions and layout of your beverage crates. Consider the number of drinks you want to carry and the size of the bottles or cans.
- Cut the wood boards to the appropriate measurements using a saw.
- Assemble the wooden pieces to form the sides, bottom, and handle of the crate. Use screws or nails for secure attachment.
- Sand the surfaces of the crate to create a smooth finish. Pay attention to any sharp edges or rough spots.
- If desired, paint or stain the crate to enhance its appearance. Allow it to dry completely.
- Once the paint or stain is dry, your wooden beverage crate is ready to use! Fill it with your favorite drinks and transport them with style and convenience.
9. Crafting a Beverage Tote

For those on-the-go moments when you need to carry your beverages, a beverage tote is a perfect solution. This compact and portable bag is designed to hold one or more drinks securely, making it ideal for picnics, outings, or even tailgating. Let’s dive into the details of crafting your very own beverage tote!
9.1: Materials Needed
To craft a beverage tote, gather the following materials:
- Fabric or canvas
- Sewing machine or needle and thread
- Scissors
- Velcro or buttons (optional)
- Handles or straps (optional)
9.2: Step-by-Step Instructions
Follow these step-by-step instructions to craft your beverage tote:
- Start by selecting a durable fabric or canvas that can withstand the weight of your beverages.
- Cut the fabric into two rectangular pieces of equal size, ensuring they are large enough to hold your drinks comfortably.
- Place the fabric pieces together, with the right sides facing inward. Sew along the edges, leaving the top open.
- If desired, add handles or straps to the tote for easy carrying. Sew them securely to the sides of the tote.
- If desired, add closures such as Velcro or buttons to keep the top of the tote secure.
- Once all the sewing is complete, turn the tote right side out and give it a final press with an iron.
- Your beverage tote is now ready to use! Place your drinks inside and enjoy the convenience of having a portable beverage carrier.
10. Building a Bike Hanger

Keeping your bike organized and out of the way can be a challenge, especially in smaller spaces. A bike hanger is a fantastic storage solution that allows you to hang your bike securely on a wall or ceiling. Let’s explore how you can build your very own bike hanger!
10.1: Materials Needed
To build a bike hanger, gather the following materials:
- Wood board or metal bracket
- Screws or nails
- Drill
- Saw
- Screwdriver or hammer
10.2: Step-by-Step Instructions
Follow these step-by-step instructions to build your bike hanger:
- Start by selecting a sturdy wood board or metal bracket that can support the weight of your bike.
- Determine the desired height and location for your bike hanger.
- Mark the position of the hanger on the wall or ceiling and ensure it is securely attached to a stud or using appropriate anchors.
- Attach the wood board or metal bracket to the wall or ceiling using screws or nails. Make sure it is tightly secured.
- If using a wood board, you may need to cut it to the desired length using a saw.
- Once the hanger is securely attached, hang your bike by its frame or wheel on the hanger.
- Ensure that the bike is stable and properly supported before releasing it.
11. Building a Garage Tool Shelf

Keeping your tools organized and easily accessible is essential for any DIY enthusiast. A garage tool shelf is a practical storage solution that allows you to keep your tools in order and within reach. Let’s explore how you can build your very own garage tool shelf!
11.1: Materials Needed
To build a garage tool shelf, gather the following materials:
- Wood boards
- Screws or nails
- Drill
- Saw
- Sandpaper
- Level (optional)
11.2: Step-by-Step Instructions
Follow these step-by-step instructions to build your garage tool shelf:
- Start by designing the dimensions and layout of your tool shelf. Consider the size and number of tools you need to store.
- Cut the wood boards to the appropriate measurements using a saw.
- Assemble the wooden pieces to form the shelves and supports of the tool shelf. Use screws or nails for secure attachment.
- If desired, sand the surfaces of the tool shelf to create a smooth finish. Pay attention to any sharp edges or rough spots.
- Use a level to ensure that the tool shelf is straight and level when attaching it to the wall.
- Securely attach the tool shelf to the wall using screws or nails. Make sure it is tightly secured and can support the weight of your tools.
- Once the tool shelf is assembled and attached, organize your tools on the shelves according to your needs. Enjoy the convenience of having your tools easily accessible and organized in your garage.
12. Conclusion
In conclusion, DIY projects offer endless possibilities for middle-aged men to tap into their creativity, enhance their skills, and create functional and personalized items. Whether you’re a seasoned woodworker or a beginner looking to explore new hobbies, there’s a DIY project for every skill level and interest. From building wooden furniture to organizing your tools, these projects allow you to showcase your craftsmanship and add a personal touch to your home or workspace.
So, don’t hesitate to pick up your tools, unleash your creativity, and embark on a DIY adventure that will not only provide you with a sense of accomplishment but also enhance your surroundings. Happy DIY-ing, and enjoy the journey!

FAQs
What are easy DIY projects for home entertainment?
Easy DIY projects for home entertainment include building a simple TV wall mount, making a foldable game table, and installing LED ambient lighting for visual impact.
How can I create a DIY game table at home?
To create a DIY game table, choose durable wood, add cup holders and edge trim, and finish with paint or epoxy for a polished entertainment piece.
What DIY living room projects improve entertainment?
DIY living room projects that enhance entertainment include mounting a TV, installing surround sound shelves, and building custom lighting or media console upgrades.
Are DIY home entertainment projects expensive?
DIY home entertainment projects can be budget-friendly—many use affordable materials and recycled pieces, letting you create stylish, functional builds without breaking the bank.
Where can I find instructions for DIY home entertainment ideas?
You can find step-by-step guides for DIY home entertainment ideas on crafting blogs, YouTube tutorial channels, and dedicated DIY websites offering floor plans and materials lists.

